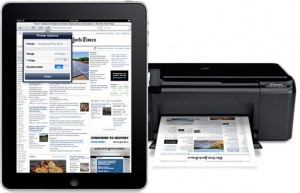
If you spend more time on your iPad than on your computer, like so many people seem to be doing these days, then there must have been moments when you wanted to print something but didn’t know how to. The multitude of features that the iPad has makes it a useful and practical tool whether it’s for business or personal use. Wireless printing from the comfort of your home is one of these features.
How many times did you have to print a business email or a photo but you just didn’t know how to set up printer on iPad? The great news is that your iPad has a native printing capability that you can use right away, via AirPrint. In order to enjoy this feature, you must have a printer that is compatible with AirPrint, such as one manufactured by Brother, Canon, Epson, or Samsung.
How to Set Up Printer on iPad
Go through the indications below and you’ll be able to print your document or photo right away:
1. Connect your printer to the Wi-Fi network.
2. Connect the iPad to the same Wi-Fi network.
3. Tap any AirPrint compatible app. (These include Mail, Photos, Safari, Notes, Maps, but also many other third-party apps).
4. Tap the envelope icon.
5. Tap “Print”.
6. Tap “Select Printer”. If the configuration is correct, your printer should appear on the list.
7. Tap your printer to select it and print.
Don’t worry if your printer is not compatible with AirPrint. The solution is to download O’Print on Windows or HandyPrint on Mac, two programs that will tell your iPad that the printer connected is in fact AirPrint-compatible. For this setup to work properly, your computer must be connected to the same Wi-Fi network as your iPad. Problem solved.
Now that you know how to set up printer on iPad, you can test it by starting printing the photos or texts you need.
PS: Don’t forget to check the many other iPad and iPhone tutorials on our blog.

