Keeping your iPad application icons organized will help you avoid clutter and improve productivity a little. There are two convenient ways to move icons, either manually, directly from the device, or through a computer with iTunes. In this article you’ll discover how to do both.
 How to Move Icons on iPad Manually
Do this when you want to quickly arrange a few icons.
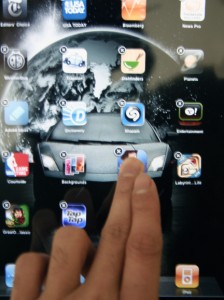
- Touch any icon and hold your finger on it until all the icons begin to jiggle.
- Move your finger away from the icon.
- Identify the icon you want to move and touch it and then drag it to the new position you want to assign it to and drop it there.
- Take your finger away from the icon and drag the other icons you want to move.
- Press the home button to save the changes.
If you use multiple pages (you can have up to 11) and would like a few essential apps to appear on every screen, simply tap and hold an app until the icons jiggle, and then drag the app to the dock at the bottom of the page.
You can also quickly sort your icons alphabetically. Go to Settings > General > Reset Home Screen Layout. The default Apple apps will appear on the first page, while on the other pages the rest of the icons will appear alphabetically.
How to Move Icons on iPad With iTunes
Organizing icons with iTunes can be quicker than organizing them manually. So if you have a computer nearby, launch iTunes, plug your iPad, and follow the steps below.
- Select your iPad.
- Tap Apps.
- You will see a virtual screen with your apps and pages.
- Drag and drop apps to a different position or page.
- Sort your apps into folders by dragging an app into another app. A folder supports up to 20 icons.
- Rename app folders by taping the X sign.
Now that you know how to move icons on iPad go and sort your apps and pages, arranging them more conveniently, so you can access them faster.


