Whether you found an iPhone or managed to forget your own password and can’t access your phone, it’s a real problem. You can try and guess, but most of the time, it won’t work.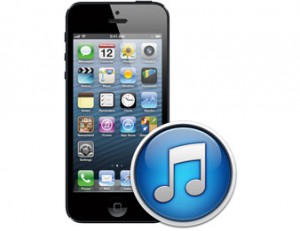 So what should you do do to be able to use your iPhone again? The easiest method would be to reset the device to it’s original setting by getting some help from iTunes. This way you will also erase all the apps, data and contacts. Sure, it’s a little disaster, but something you have to do when there is no other way out. Here are step by step instructions.
- First you need to shut off the phone. Turn it off by holding the top right button of the phone. Check if the device is completely off.
- Turn on your computer and see if it has iTunes downloaded.
- Holding down your iPhone’s Home button, connect the USB to your phone. Now the phone will turn on with the Apple image on the screen. Keep holding the Home button until you see that iTunes has started the recovery mode on the iPhone.
- Click „Restore“ on the screen and confirm. Now you will get a few prompts about the software and the license agreement and then you will see that the software has started downloading.
- Now the downloaded software will be transferred to the phone, which will reboot a few times in the process. When the transfer has finished, you will see another prompt, saying that your iPhone has been restored to it’s factory settings. After another reboot, you can start using the phone just like you did before. Unfortunately, you will have to do all the customization all over again, but at least you can start using your iPhone again.






i tried all the steps and at the end itunes said that it couldn’t restore because iphone was locked with a password, what should i do now, i really want to use my phone.
Hi Sarah,
We updated our post with a helpful video please kindly check. Hope you get your iPhone back.
Evren.
i forgot my restriction password n couldn’t open my restrictions how can i reset it???
any answer please help me…….
Hi Saru,
I found below solution after I googled your problem;
If ibackupbot doesn’t work for you and/or you don’t want to jailbreak, then you can do this manually with a great deal of effort.
Here is an outline step-by-step – for VERY ADVANCED USERS ONLY – it would take me too long to describe everything for users who aren’t familiar with hex-editing files.
AT YOUR OWN RISK!!
You will need
1) a hex editor – I used the one from http://www.hexeditor.com
2) an online SHA generator – I used https://hash.online-convert.com/sha1-generator
3) a plist editor – I used this one – https://www.icopybot.com/plist-editor.htm
4) a successful unencrypted backup to disk (not icloud) of your device
Outline step-by-step
1) iTunes should be closed
2) Find the directory with your latest backup
3) find the file 662bc19b13aecef58a7e855d0316e4cf61e2642b – this is the backup of Library/Preferences/com.apple.springboard.plist
4) copy it to another location safely and make a note of its exact file size in bytes (hexadecimal form)
5) upload it to the SHA file generator and make a note of the SHA-1 hash of its contents (hex form)
6) rename it in the original location to a .plist extension
7) edit this plist to include the PIN as described by others, and/or to change the number of times failed.
8) rename it to remove the .plist extension
9) make a note of its exact size in bytes (hex form)
10) upload it to the SHA file generator and make a note of the SHA-1 hash of its contents (hex form)
Now we need to tell Apple’s file database about the changes we have made.
11) make a backup copy in another location of manifest.mbdb
12) open in the main backup location manifest.mbdb in the hex editor.
13) Search for the string com.apple.springboard
14) Soon after this entry you will see hex for the SHA-1 your wrote down in 5) above. Replace it with the SHA-1 from 10) above.
15) Soon after that you will see a series of zeros followed by the file size in bytes you wrote down at 4 above. Replace this with the size you wrote down at 9) above.
16) save the mbdb file
Now you can restore from this backup using iTunes as normal.
Worked for me! But you have to be very careful and methodical.
reference : https://discussions.apple.com/thread/2667637?start=135&tstart=0